 The 'final drawing' in question. 1.) Collect Good Reference This environment is part of my personal project where I am designing everything from the book Revolution by Jennifer Donnelly. I already knew the description of the environment I wanted to draw because the author had such a rich description of it in the book (part of the reason why I chose this book to design from). I knew this place was a 4th floor loft, with a kitchen and crammed with historical things from the French Revolution. I noted down the specifics of what props needed to be there and then looked for reference for a space to draw from. 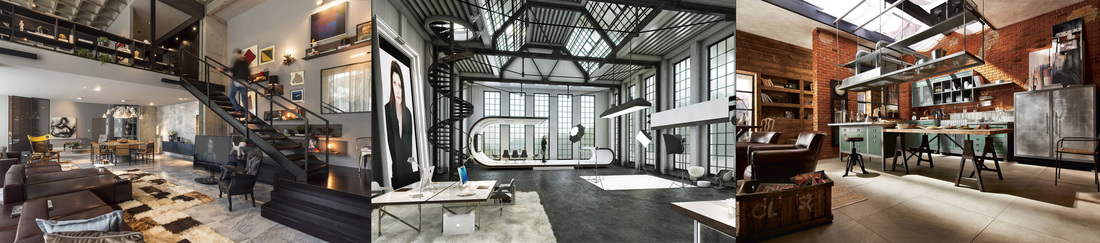 I found a few good loft references to use. I pulled aspects from each. 2.) Design the Space For this image, I decided to try a new technique where I would draw the top down view of the room first, so that I could focus on placement and design of the space, and then "draw up" from there. This is a technique I saw on this tutorial on perspective. For my job as an environment designer on Superbook, I always have to include a top down view of the environments for the modelers to use, so this seemed an appropriate time to try this. 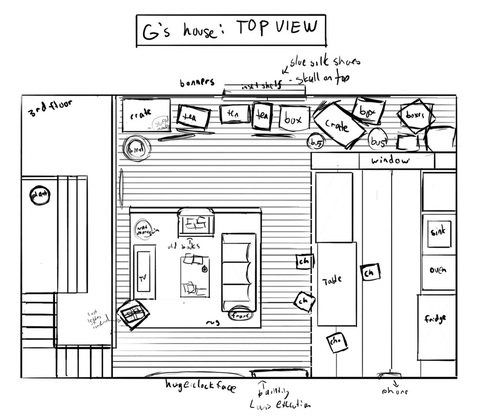 The top view of the loft. 3.) Establish Composition  2 preliminary composition sketches. For this technique, I tilted my top down view in perspective and drew the dimension upwards. I tried many different iterations of my composition, but chose to only share the two I was deciding between. It's important to think on your camera angle here. I knew I needed to show a lot of the environment so I went for a higher angle, with a high horizon line. After composition is figured out, find out where your vanishing points are and set up your perspective grid. I learned a new technique for setting up easy grids in Photoshop using the polygon tool. See the tutorial here. 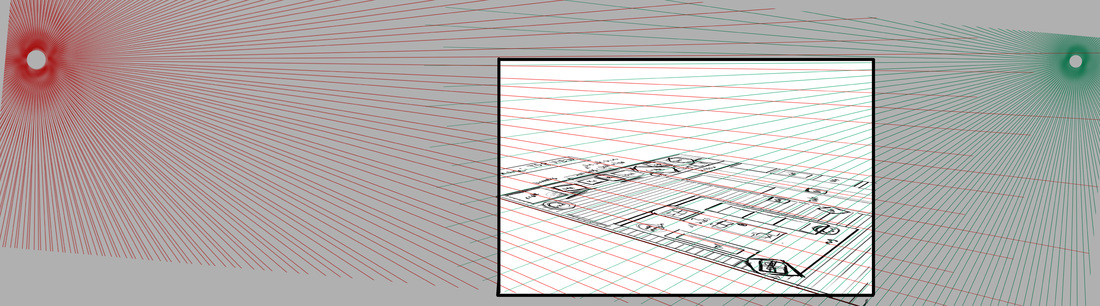 My perspective grid. You can tell I initially didn't have a horizontal horizon line, so I fixed that right up. 4.) Draw through the forms for everything. "Drawing Through" is something I learned from old how-to-draw art school books written by some of the 20th century classic artists including Norman Rockwell. It means drawing the entire form, including the interior perspective and form that isn't visible. This ensures the form will be correct, instead of the artist only rendering the outline. This is really important for complex environment illustrations, because there is so much overlap. To maintain correct proportion, I draw each prop as it would appear unobstructed. Then, on an additional layer, I draw the overlapping prop, finishing with erasing the lines of the overlapping item.  Even though the couch and coffee table would be overlapped by the crate and tv, I still drew them out first. 5.) Draw Props Last I make sure to render all the surfaces and large props for my scene before doing the smaller items. I find this more efficient because I don't get as overwhelmed by "dressing" the scene all at once. In my top down view, I had noted where I wanted the important props to go, but ended up moving them around a lot after my angle was established. 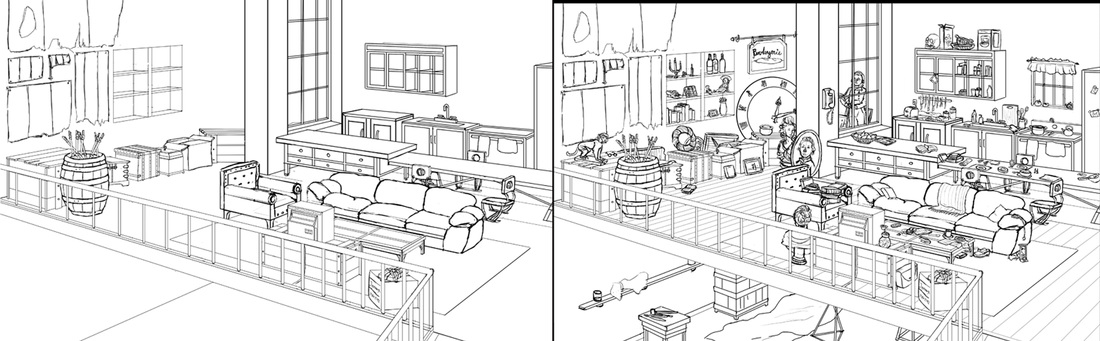 It takes so many props to make something look lived in! You never realize how much stuff you have until you try to draw it. Keep an eye out for the final painting! And if anyone has anything they want answered or shown in a blog, just send me a note through my contact form and I'll write one.
1 Comment
|
Meghan Boehman Art
Art tips I learn and helpful resources that I find. Archives
April 2016
|
 RSS Feed
